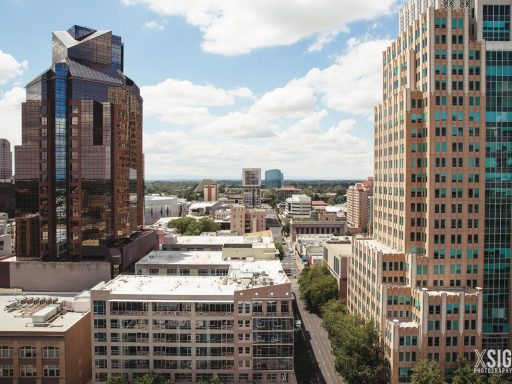
How to Shoot Architectural Photography Detailed Guide.
This article will give a deep detailed view of how to shoot architectural photography with the best tips and techniques. As you might know, Architectural photography is a captivating genre that allows photographers to showcase the beauty and intricacy of built structures. Whether you’re a seasoned pro or just starting, this guide will provide you with essential techniques and tips for shooting stunning architectural photographs that captivate and inspire.
Read more: What is Architecture Photography

1: Understanding Your Gear to Master Shooting Architectural Photography

1.1 Choose the Right Camera
Invest in a camera with manual settings to have full control over exposure and focus. While DSLRs and mirrorless cameras are popular choices, high-end smartphones can also produce impressive results.
- Sensor Size: Opt for a full-frame camera to achieve the best image quality and dynamic range, which is crucial for capturing the wide range of tones in architectural photography, from shadows to bright highlights.
- Resolution: High-resolution cameras, typically above 20 megapixels, are preferred for architectural photography. This allows for capturing fine details and enables large-scale prints without compromising image quality.
- Lens Compatibility: Ensure the camera is compatible with a wide range of lenses, especially wide-angle and tilt-shift lenses. Wide-angle lenses are essential for capturing the full scope of buildings, while tilt-shift lenses allow for perspective correction, minimizing distortion in vertical lines.
- Dynamic Range: Look for cameras with a high dynamic range to better handle the contrast between light and dark areas, preserving detail in both.
- ISO Performance: Good ISO performance is key for shooting in various lighting conditions without introducing excessive noise into the image.
- Manual Controls: A camera that offers extensive manual controls over settings like aperture, shutter speed, and ISO is crucial for the precise adjustments needed in architectural photography.
- Durability and Weather Sealing: Since architectural photography often involves shooting in various outdoor conditions, a camera with robust build quality and weather sealing is beneficial.
1.2 Selecting Lenses
Wide-angle lenses, such as 14-24mm or 16-35mm, are excellent for capturing entire buildings and their surroundings. Prime lenses like 24mm or 35mm can provide a more natural perspective. Experiment with different lenses to find your preferred style.Over all with all these instruments you can easily get techniques to know how to shoot architectural photography in a professional way.
- Wide-Angle Lenses: Essential for capturing the full scale of buildings and spaces. Look for lenses in the 16mm to 35mm range for full-frame cameras, or equivalent for crop sensors, to get expansive interiors and exteriors without moving too far back.
- Tilt-Shift Lenses: These allow for perspective control, enabling photographers to correct the vertical lines that tend to converge in architectural images when shooting upward or downward. Tilt-shift lenses are invaluable for maintaining the true proportions and straight lines of buildings.
- High Sharpness and Low Distortion: Architectural photography demands lenses that offer sharpness across the entire image, from center to edges, and minimal distortion. This ensures that the architectural details are crisply captured and the lines of the structures are straight and true.
- Large Aperture: Although not as critical as for other types of photography, a large aperture lens (e.g., f/2.8) can be beneficial for shooting in lower light conditions and achieving a shallow depth of field when needed.
- Lens Coatings: Look for lenses with advanced coatings that reduce flare and ghosting, which can be particularly problematic in architectural photography due to the prevalence of reflective surfaces and strong backlighting.
- Manual Focus Override: Since precise focusing is crucial in architectural photography, select lenses that offer manual focus override in AF mode, allowing for fine adjustments after autofocusing.
- Versatility for Detail Shots: While wide-angle and tilt-shift lenses are staples, a mid-range zoom or prime lens can be valuable for detail shots or when you cannot step back to capture the whole building.
- Compatibility with Filters: Architectural photographers often use polarizing and neutral density filters to control reflections and light. Ensure your lens can accommodate these filters.
2: Composing your shots
2.1 Master the Rule of Thirds
The rule of thirds is a fundamental compositional technique. Divide your frame into thirds both horizontally and vertically, and position key elements at the intersections or along these lines for a balanced and visually appealing composition.
2.2 Capture Leading Lines
how to shoot architectural photography is a question that doesn’t have a simple answer, we have to move with lots of things together like Utilizing architectural features like paths, walls, or beams as leading lines that guide the viewer’s eye through the frame. Leading lines add depth and visual interest to your photographs.
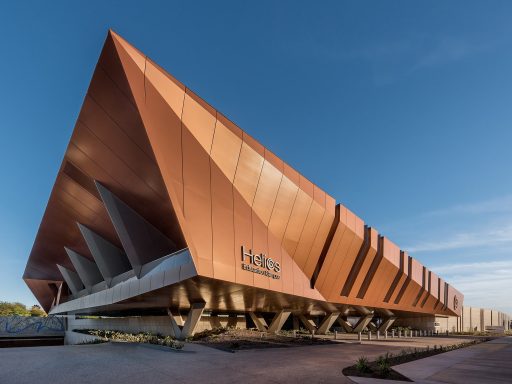
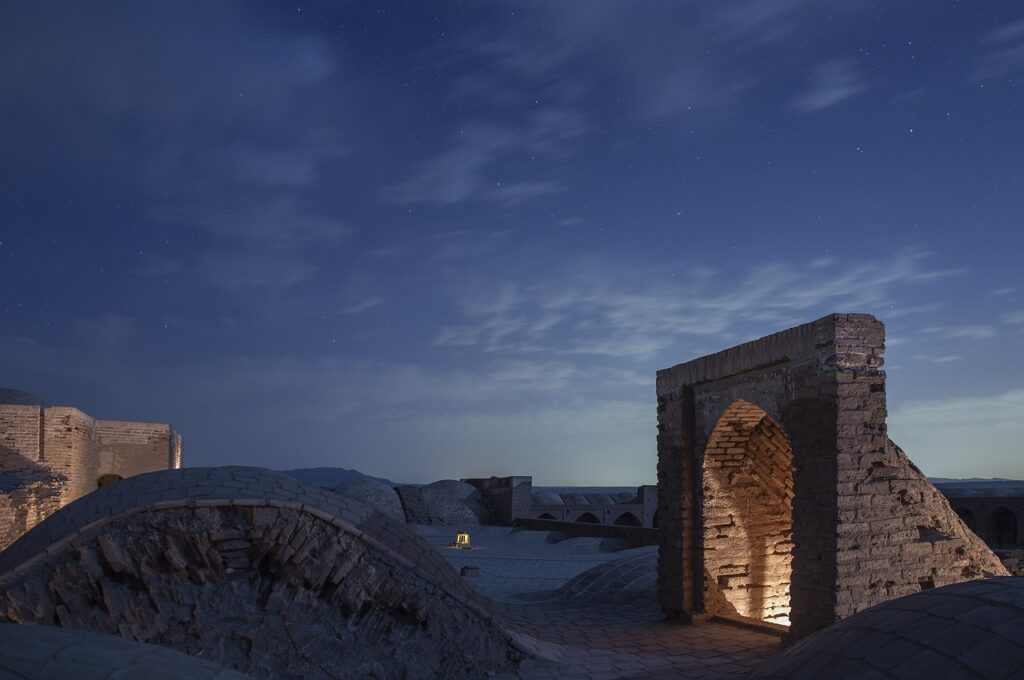
3: Controlling Light and exposure
![]()
3.1 Optimal Lighting Conditions
Shoot during the golden hours, just after sunrise and before sunset, for soft, warm light that enhances your architectural subjects. Overcast days can provide even lighting, reducing harsh shadows.
- Use the Golden Hours: Shoot during the early morning or late afternoon when the sun is low in the sky. This soft, warm light enhances textures and colors and casts long, dramatic shadows, giving depth to architectural features.
- Cloudy Days Are Your Friend: Overcast conditions provide diffused, even lighting that minimizes harsh shadows and highlights, ideal for capturing the true colors and details of buildings.
- Use a Tripod for Long Exposures: A tripod is essential for long exposure shots, allowing you to capture a building in lower light conditions without increasing the ISO or sacrificing image sharpness.
- Experiment with Time of Day: The direction and quality of light change throughout the day. Experiment by shooting at different times to see how these changes affect the building’s appearance, highlighting different features or aspects.
- Incorporate Interior Lighting: When shooting interiors or at twilight, use the building’s interior lighting to your advantage. It can add warmth and depth to your photos and highlight architectural details.
- Reflectors and Diffusers: For smaller scale or detail shots, use reflectors to bounce light into shadowed areas and diffusers to soften harsh sunlight.
- Polarizing Filters: Use a polarizing filter to reduce reflections on glass or water and to enhance the sky’s contrast, making architectural features stand out more clearly.
- Manual Exposure Control: Take control over your camera’s exposure settings. Use manual mode to adjust the shutter speed, aperture, and ISO to achieve the desired balance of light and detail.
- Bracketing Exposures: This technique involves taking several shots of the same scene at different exposures to ensure you capture one with the optimal light. It’s especially useful in challenging lighting conditions.
3.2 Bracketing for HDR
To capture the full dynamic range of an architectural scene, use bracketing. Take multiple shots at different exposures (underexposed, correctly exposed, and overexposed) and merge them into an HDR (High Dynamic Range) image during post-processing.
- Use a Tripod: Stability is key for HDR photography since it involves merging multiple exposures of the same scene. A tripod ensures that each shot is aligned perfectly, which is crucial for post-processing.
- Bracket Your Exposures: Most cameras have an auto-bracketing feature that automatically captures the same scene at different exposure levels. Typically, you’ll want at least three shots: one underexposed, one correctly exposed, and one overexposed. However, for architectural photography, five to seven shots at 1 EV (Exposure Value) intervals can provide even more detail for blending.
- Shoot in RAW: Capture your images in RAW format to ensure the highest quality and flexibility in post-processing. RAW files contain more data than JPEGs, allowing for greater adjustments in exposure, shadows, highlights, and colors.
- Manual Mode: Use manual mode to maintain consistent settings (aperture, ISO) across all exposures. This ensures that the depth of field and the level of noise remain constant, with only the shutter speed changing to alter the exposure.
- Post-Processing Software: Use dedicated HDR software or the HDR tools in popular photo editing software to merge your bracketed shots. These tools allow you to adjust the strength of the HDR effect and fine-tune the image to achieve a natural or dramatic look, depending on your preference.
- Use a Cable Release or Timer: To avoid camera shake, use a cable release or your camera’s built-in timer when capturing your bracketed shots.
- Avoid Over-Processing: While it’s tempting to push the HDR effect to its limits, strive for a balance where the image looks natural and the architectural details are enhanced without becoming surreal or overly artificial.
- Experiment with Angles and Composition: HDR can dramatically change the mood and impact of your architectural photos. Experiment with different shooting angles and compositions to see how the HDR effect can best enhance the architectural features and lighting of your scene.
4: Perfecting your Technique
4.1 Steady Your Camera
Use a tripod to ensure sharp, blur-free images, especially in low light conditions or when taking long exposures. A remote shutter release or the camera’s timer function can further eliminate camera shake.
4.2 Depth of Field Control
Experiment with aperture settings to control depth of field. Smaller apertures (higher f-stop numbers) create a greater depth of field, ideal for capturing intricate details in architecture. Larger apertures (lower f-stop numbers) create a shallow depth of field, highlighting specific architectural elements.
5: Post-Processing And Enhancement
5.1 Editing Software
Learn to use post-processing software like Adobe Lightroom and Photoshop to refine your images. Adjust exposure, correct distortion, enhance colors and apply other adjustments to bring out the best in your architectural photographs.
5.2 Maintain Realism
While post-processing can enhance your photos, strive for a natural look. Avoid over-editing, as it can lead to an artificial appearance that detracts from the authenticity of the architecture.
Conclusion
On the question of how to shoot architectural photography, you have got an overview that Architectural photography is a window into the soul of our built environment. It allows you to freeze moments in time, capture the essence and personality of structures, and tell compelling visual stories. The architecture surrounding us is a testament to human ingenuity, culture, and history, and as a photographer, you have the unique privilege of becoming its visual storyteller.
Understanding your gear, from choosing the right camera to experimenting with different lenses, sets the foundation for your creative journey. Composing your shots with techniques like the rule of thirds and leading lines enables you to add depth and narrative to your images, making them visually engaging and memorable.
relish the rewards, and let your passion for photography continue to evolve and flourish. Ultimately, it is through your lens that the beauty of architecture can be shared and cherished by people around the world. In the end, we have now covered a detailed guide on how to shoot architectural photography with the best tips and tricks, thanks for being tuned with us till last.